


Our Montessori Home in Baltimore, MD
After a month of designing, purchasing and experimenting, I’m finally happy with the Montessori design of our new home.
When we first moved in, Mark and I agreed that the thick, dark-green carpeting in the living room had to go immediately. Within a week, Mark had put in brand-new laminate wood flooring. It cost less than $300 and completely transformed and uplifted the energy of the house! (Home Depot and a handy husband is all it takes, my friends). We then agreed that since the children will be spending the most time at home, we would set up their work space here on the first floor in the living room.
I’m so glad Mark and I are on the same page about our children: their education is our priority and you can see it when you come to our home.
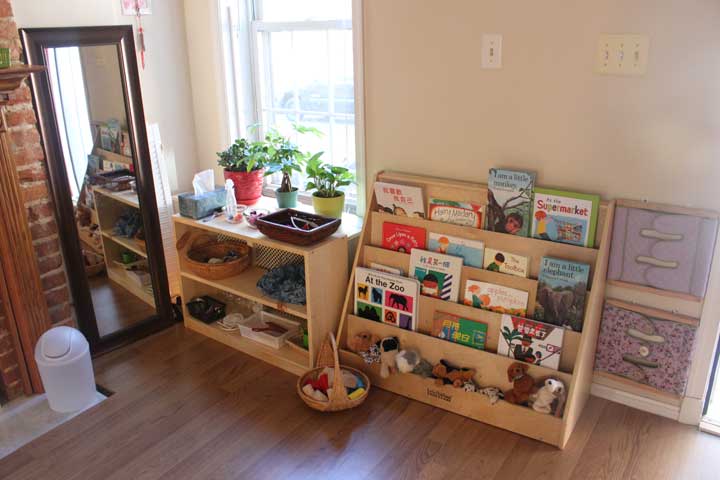
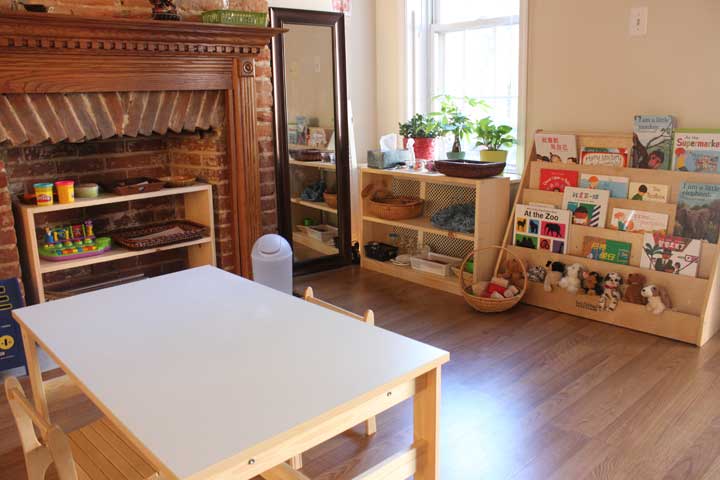
Here are a few pictures of the children’s new work space:
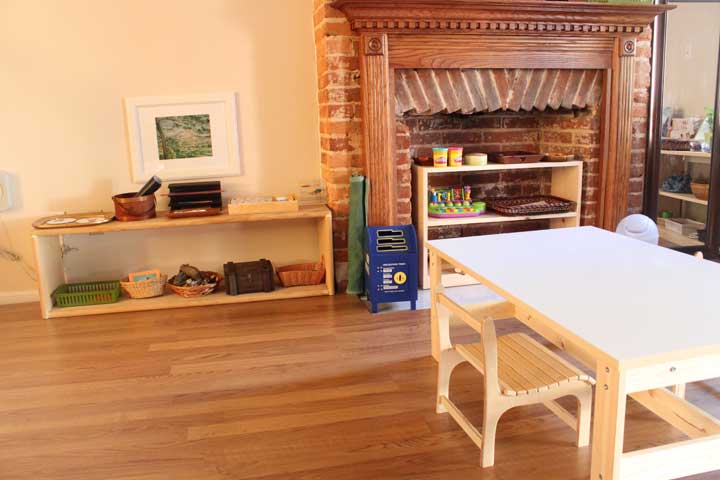
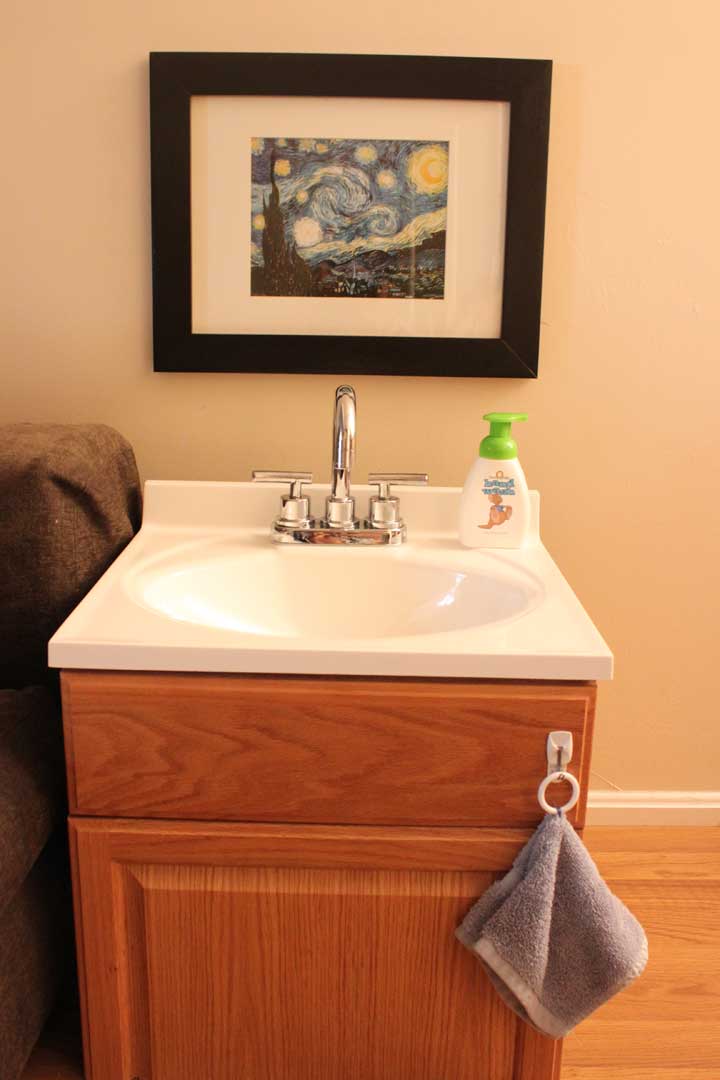
On the other side of the room is my favorite thing of all – a child-sized sink that my husband designed and built! It is both luxurious (because so few homes have it) AND oh-so necessary (I never have to lift them up to the sink, press their stomach into the cold ledge of the sink and then hurry them through the whole washing process again!). Powered by a pump, it runs water up from a container through the faucet and then drains back down into the same container.
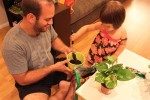
Here are some pictures of my amazing husband at work:
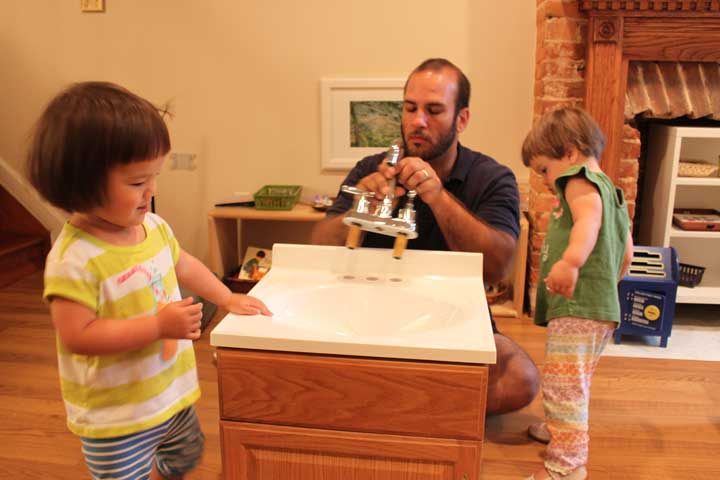
This is a standard sink from Home Depot, which Mark sawed down to size. Here he is installing the faucet. A goose-neck faucet makes it possible for children to fill up watering cans or pitchers at the sink.
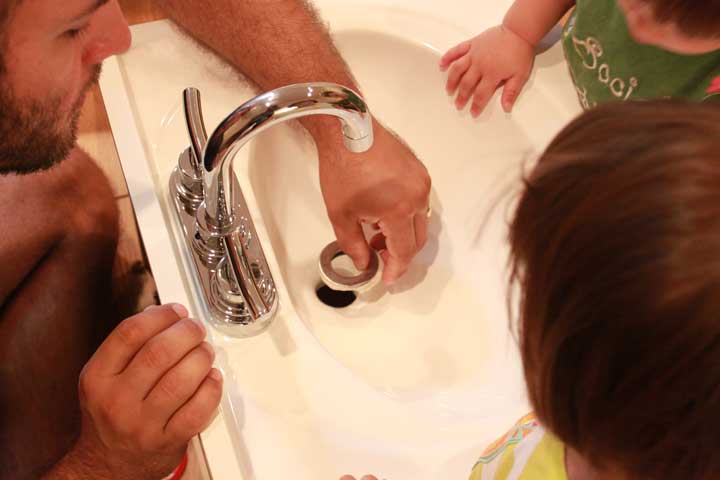
He puts plumber’s putty around the drain ring in order to secure it to the sink
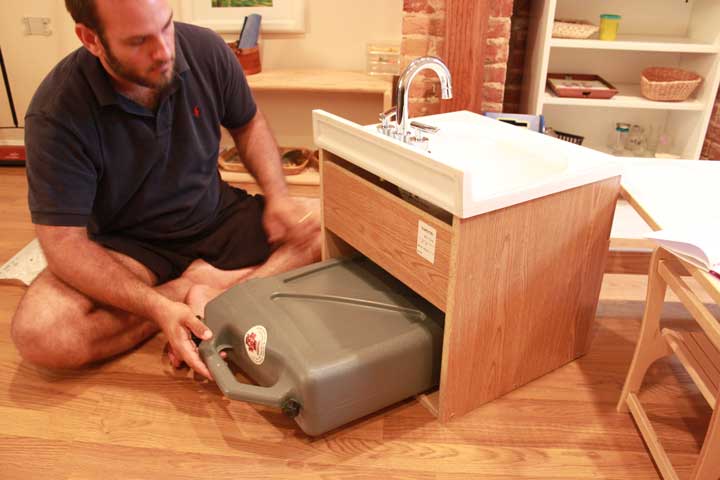
This container is from a fishing and marine store. For convenience’s sake, the water comes out of here and drains back here. We change it daily, which is simple to do.
You can’t see the pump, but once it’s plugged in, all you have to do is turn on the faucet and it works!
If you are in our neighborhood or passing through Baltimore, come for a visit! And bring the little ones to come and play with us!
In upcoming posts, I’ll be showing you the other areas in our home, including where we get dressed and where we eat. Stay tuned!


Wow! Thank you so much for sharing! I love the child-sized sink in your home! Your girls are very lucky to have a Montessori Mom and a handy Dad! Thank you for sharing how your husband made it. I would love to see more of your home and some close-ups of the activities on the shelves that you are offering your girls.
What a beautiful, thoughtful and inspiring place! Wish we could pop round for a visit (the hike from Australia would probably be a bit much :P)
HI Carrie, Thanks for writing! Come back and read often! I'll be posting more about individual activities on our shelves throughout the next two months but it'll be sprinkled with many other topics as well. I've got articles scheduled to early December…
I've shared this on my school's facebook page – I recently did Independence at Home as a parent ed topic – I googled some images to share with them but now they've got this awesome tour to follow!
Where did he find directions for this??? I need to make one of these!
This is just wonderful. My husband and I have been reading your blog as we have 15 month twins (b/g) that will be attending a montessori preschool. We have limited space in our small home and want to maximize it as best we can. Do you feel comfortable showing pictures of the piping on the sink or telling me how to do it? We would like to make one of our own. Thank you so much for all of your insight! It helps so much to see others pave the way. xoxo Stephanie
It is embarrassing how long ago some of these questions were asked, but I figure it’s better late than never to respond! The large table in the center is an IKEA children’s table, with legs cut off. If you’re looking, it’s the IKEA children’s table with adjustable legs, but I found that it was still too high for toddlers. When in doubt, shorter is always better than too tall. They can always bend over to work, but when it’s too tall, it really becomes a hindrance to their independence. The bookshelf can be found here: https://www.amazon.com/gp/product/B0028XBXJY/ref=pd_lpo_sbs_dp_ss_1?pf_rd_p=1944687622&pf_rd_s=lpo-top-stripe-1&pf_rd_t=201&pf_rd_i=B002C6AV9K&pf_rd_m=ATVPDKIKX0DER&pf_rd_r=17SJB9EAWPHCXET8X85Q
As for the piping, my husband was going to do a tutorial, but never got around to it. I’m very sorry about this! He basically bought a regular sink from Home Depot, chopped it down to a height that would be suitable for children, got a boat water pump, and then placed a big flat plastic water container under the sink. The boat-pump pumps water from the plastic water container when the child turns on the faucet. The water then drains back into the same plastic water container. You need to change the water everyday, with this solution. I admit this is not an easy solution and not one that everyone has the time and energy to make, but your toddler NEEDS (IN A BIG WAY) some method of accessing water independently. Here’s a suggestion, get one of those large water containers with a spigot, buy a sturdy table, place the container on the table inside the bathtub. This way children can go in and fetch water that way without making a big mess. Any other suggestions out there?
Love the Montessori enviroment. I wanted to know how tall are the tables and chairs, also about the book display how big is it…trying to buy similar things to my 13 months old. Thanks a lot, love your work and love to your babies
Please share with me where you got that big desk and chair. I love it 🙂
I would love more in depth info on how to create the kid sink. It is so handy!
Could you tell and show how you made the sink so it works?
Hi..Could you tell me how this was made? I’d love to make one for my son.
Very nice job for the sink. I’d lije to make one for my grand-son and will look for parts but need some hints to find them in France. Plse could you explain how you power & control the pump so that I could start making one for him? Many thanks.
Hi
Saw the sink. I’d like to make one for my grand-kid. I have questions about the pump and its power. Plse could you telle me what is the power needed fot hte pmp and how you power it. Many thanks. RGDS
Vorrei acquistare il lavandino come posso fsre?
Hello!
Thank you for sharing!
I have been looking for diy options for a children‘s sink.
Would you feel comfortable sharing details how you built yours?
I‘d love to build one for my 14 month old son.
Thank you so much and all the best for your family.
I’m also looking for more specific directions on the vanity part. Did your husband just cut the door across the bottom to make it shorter? I’d love more insight and more pictures. This is exactly what I’ve been looking for!