Our Montessori Home In Baltimore Part II: Where We Eat
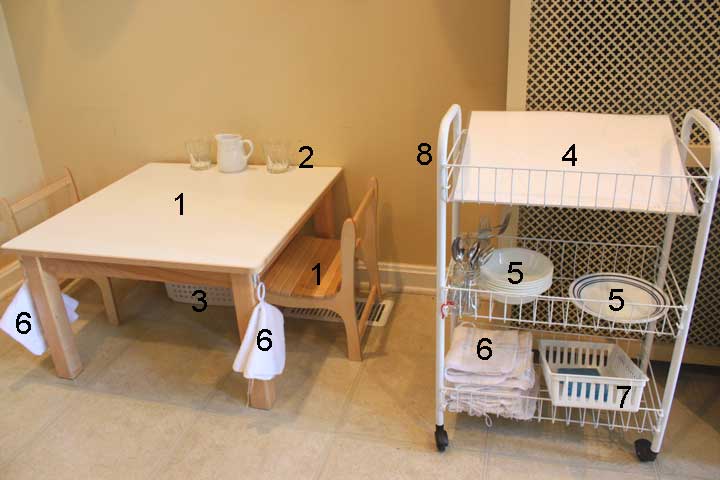
To continue the tour of our new Montessori home, here is where we eat.
1. This is the same weaning table we’ve had since they were 6 months old – we’ve gotten more use out of the $150 table than anything else we’ve ever bought for the kids. However, I replaced the heavy armchairs with light slatted chairs. These chairs were designed by Maria Montessori herself. They are made of birch wood, so they are lightweight enough for children to carry, but the design makes them extremely sturdy. I also find them to be beautiful to look at. Email me if you want the name of the carpenter in Denver who made these for me.
2. The cups and pitcher are permanent fixtures on this table. This is where the children get a drink of water during the day.
3. When not in use, we keep this dirty dish basket under the table. After meals, they clean up their own table and put their dishes in here.
4. These are their placemats. I’ve pre-drawn outlines of plate, bowl, fork and knife on a piece of paper, then laminated it. This great Montessori trick makes it so easy for little ones to set their own table. When they’re setting the table, you’ll see them point at the outline of the fork and say, “Fork,” then go to the cart to get a fork, and then point of the outline of the plate and say, “Plate,” then get one, etc. It’s like a great little cheat-sheet! I highly-recommend it. Takes about 5 minutes to make and costs very little. You can see how the children use it in the video below.
5. Here are their bowls, plates, fork and spoon. I keep the fork and spoon in separate containers.
6. These towels are used for their mouth, hands and for wiping up spills. The little hoops I’ve sewn onto the towel makes it really easy for them to hang on hooks. This tip I learned in my Montesorri training has saved me thousands of paper towels.
7. This little basket holds two sponges, which they use for wiping their mat. You can see them using it in this video here
8. This rolling cart is light, takes up very little floor space and can be moved around easily.
In order for you to get an idea of how we use this space, here is a video of the children making a smoothie, setting the table, then sitting down to eat their breakfast.
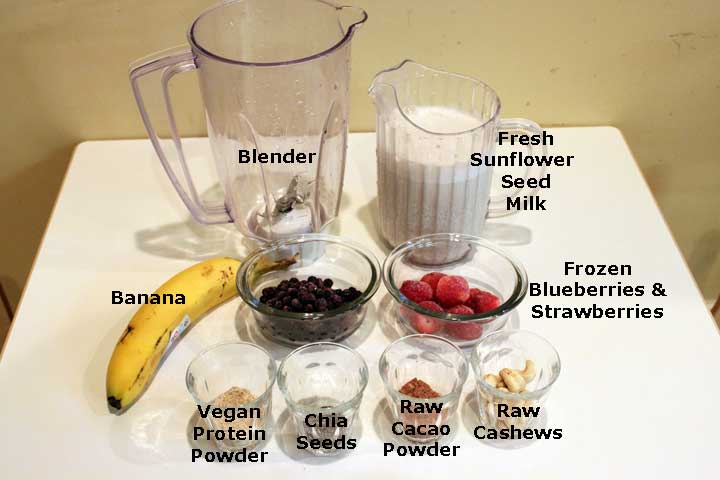
Before we start, here are the ingredients we use in the smoothie. Putting out each ingredient in individual containers makes it possible for children to make this smoothie on their own.
Here we go!
If you’re interested in making fresh sunflower seed milk, here’s a great video. It’s super easy. And instead of using Brazil nut, like he does in the video, I use cashews or sunflower seeds: http://livingmaxwell.com/how-to-make-nut-milk


