Posts Tagged ‘home environment’

How DO You Create The Best Home Environment for Your Child?

Wednesday, February 20th, 2013 4:24 pm | By Stephanie Woo
B and M Making Eggs In the Kitchen (25 months old)

B and M Making Scrambled Eggs (25 months old)

In the last two weeks, I’ve given two talks and done many private Skype and home consultations. I’ve received overwhelmingly beautiful thank-you emails. People used words like “eye-opening” “really impacted me” “a Montessori angel,” “a billion thank-you’s.” My favorite stories are things like, “Even in the few days since your talk, I’ve noticed him responding really well to increased chances at independence,” or “She received a doll a few months ago and have been astounded by the way she cares for her “baby,” so I thought another role playing toy would be great. I wasn’t thinking that she can actually peel, cut, mix, etc. using real foods, and learn by doing rather than pretending!”

Because I know my clients also read my blog, if you sent me an email, I sincerely want to thank you for your kind words and taking the time to write what you did.

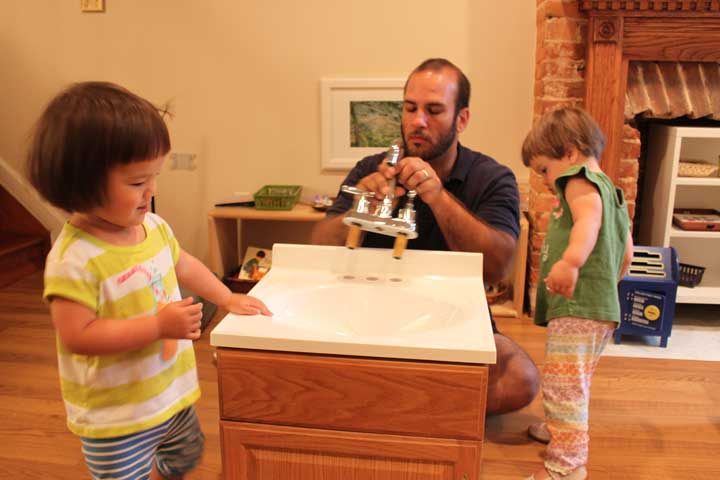
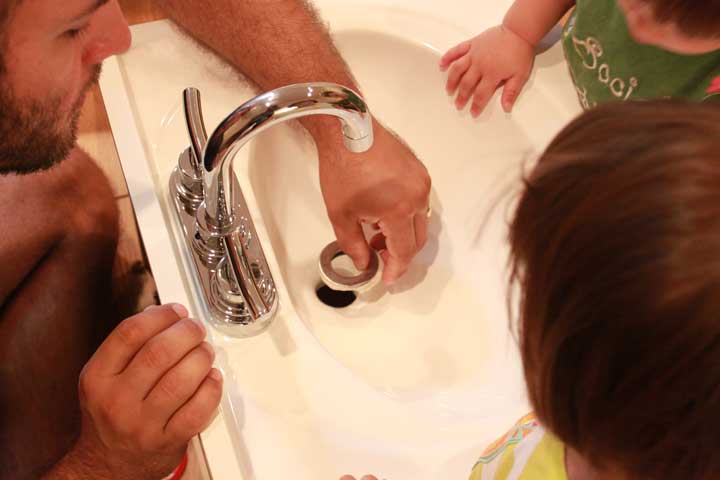
Now can I tell you the best part about all this? It’s my own experience of certainty and joy. I am more certain than ever that the best home environment is one of the most important things you can do for your child.  Parents spend so much hard-earned money on daycare, swim class, nannies and all sorts of products at Toys R Us (I’m guilty as charaged). But home is where your child spends the most amount of time. A child can go into the kitchen 20 times a day. How do you set-up a kitchen so that your child can feel ownership and work on his organizational skills?  Does he have a way to access a towel or tissue to wipe his face? Can he reach the bread and peanut butter to make himself a snack? Can he get a drink of water without asking for help? We want an environment where the child can take care of his own needs based on his own timeline and according to his own rhythm. Lucky for us, when he is taking care of his own basic needs, he’s also working on those critical skills we most want him to have: self-discipline, organization, gross and fine motor skills, self-confidence and executive skills. Why buy him a toy to exercise these things, when he can learn it from setting his own table everyday?

So, how do you do this? How can you create this for your child, too?

After my morning consultation session, I came downstairs and proclaimed to my husband: “I love my job!” I get to work with the most well-intentioned parents whose love for their children move me everyday. Parents are just looking for some advice, tips and methods that work. The Montessori Method works. Other methods may work as well, but now that you’re here, you need look no further.

For more information, please visit my Private Consultation page. Together, let’s create the best home environment for your child to learn and grow.

Our Montessori Home In Baltimore Part II: Where We Eat

Thursday, October 18th, 2012 9:22 am | By Stephanie Woo

To continue the tour of our new Montessori home, here is where we eat.

1. This is the same weaning table we’ve had since they were 6 months old – we’ve gotten more use out of the $150 table than anything else we’ve ever bought for the kids. However, I replaced the heavy armchairs with light slatted chairs. These chairs were designed by Maria Montessori herself. They are made of birch wood, so they are lightweight enough for children to carry, but the design makes them extremely sturdy. I also find them to be beautiful to look at. Email me if you want the name of the carpenter in Denver who made these for me.

2. The cups and pitcher are permanent fixtures on this table. This is where the children get a drink of water during the day.

3. When not in use, we keep this dirty dish basket under the table. After meals, they clean up their own table and put their dishes in here.

4. These are their placemats. I’ve pre-drawn outlines of plate, bowl, fork and knife on a piece of paper, then laminated it. This great Montessori trick makes it so easy for little ones to set their own table. When they’re setting the table, you’ll see them point at the outline of the fork and say, “Fork,” then go to the cart to get a fork, and then point of the outline of the plate and say, “Plate,” then get one, etc. It’s like a great little cheat-sheet! I highly-recommend it. Takes about 5 minutes to make and costs very little. You can see how the children use it in the video below.

5. Here are their bowls, plates, fork and spoon. I keep the fork and spoon in separate containers.

6. These towels are used for their mouth, hands and for wiping up spills. The little hoops I’ve sewn onto the towel makes it really easy for them to hang on hooks. This tip I learned in my Montesorri training has saved me thousands of paper towels.

7. This little basket holds two sponges, which they use for wiping their mat. You can see them using it in this video here

8. This rolling cart is light, takes up very little floor space and can be moved around easily.

In order for you to get an idea of how we use this space, here is a video of the children making a smoothie, setting the table, then sitting down to eat their breakfast.

Before we start, here are the ingredients we use in the smoothie. Putting out each ingredient in individual containers makes it possible for children to make this smoothie on their own.

 Here we go!

If you’re interested in making fresh sunflower seed milk, here’s a great video. It’s super easy. And instead of using Brazil nut, like he does in the video, I use cashews or sunflower seeds: http://livingmaxwell.com/how-to-make-nut-milk

Our Montessori Home in Baltimore, MD

Monday, October 15th, 2012 2:34 pm | By Stephanie Woo

After a month of designing, purchasing and experimenting, I’m finally happy with the Montessori design of our new home.

When we first moved in, Mark and I agreed that the thick, dark-green carpeting in the living room had to go immediately. Within a week, Mark had put in brand-new laminate wood flooring. It cost less than $300 and completely transformed and uplifted the energy of the house! (Home Depot and a handy husband is all it takes, my friends). We then agreed that since the children will be spending the most time at home, we would set up their work space here on the first floor in the living room.

I’m so glad Mark and I are on the same page about our children: their education is our priority and you can see it when you come to our home.

Here are a few pictures of the children’s new work space:

On the other side of the room is my favorite thing of all – a child-sized sink that my husband designed and built! It is both luxurious (because so few homes have it) AND oh-so necessary (I never have to lift them up to the sink, press their stomach into the cold ledge of the sink and then hurry them through the whole washing process again!). Powered by a pump, it runs water up from a container through the faucet and then drains back down into the same container.

Here are some pictures of my amazing husband at work:

This is a standard sink from Home Depot, which Mark sawed down to size. Here he is installing the faucet. A goose-neck faucet makes it possible for children to fill up watering cans or pitchers at the sink.

He puts plumber’s putty around the drain ring in order to secure it to the sink

This container is from a fishing and marine store. For convenience’s sake, the water comes out of here and drains back here. We change it daily, which is simple to do.

You can’t see the pump, but once it’s plugged in, all you have to do is turn on the faucet and it works!

If you are in our neighborhood or passing through Baltimore, come for a visit! And bring the little ones to come and play with us!

In upcoming posts, I’ll be showing you the other areas in our home, including where we get dressed and where we eat. Stay tuned!